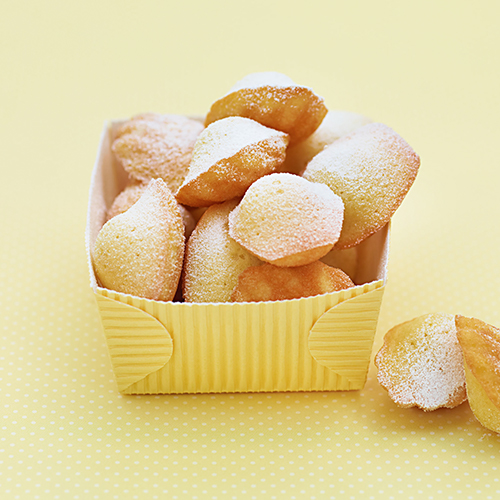
 Mini Madeleines

 Serves Serves |  Total Time Total Time |
|---|---|
| 100 cookies | 30 minutes |
 Ingredients
115 g unsalted butter
15 g brown sugar
15 g honey
100 g granulated sugar
1 g salt
120 g all-purpose flour
4 g baking powder
3 large eggs
0.5 lemon
0.5 orange
some confectioners’ sugar
 Cookware
- 1 medium pot
- 1 heatproof spatula
- 1 large bowl
- 1 whisk
- 1 plastic wrap
- 1 rubber spatula
- 1 piping bag
- 1 nonstick mini madeleine pan
 Instructions - Day 1: Make Batter
Step 1
In a medium pot, melt the unsalted butter, brown sugar, and honey over low heat. Stir gently with a heatproof spatula to ensure nothing burns. Keep the mixture warm over very low heat, or reheat if necessary.
Step 2
In a large bowl, combine the granulated sugar, salt, all-purpose flour, and baking powder and mix well with a whisk. Form a well in the center of the dry ingredients and add the eggs one by one, whisking to incorporate each before adding the next.
Tip
Use room temperature eggs to avoid cooling down the batter. If the batter is too cold, the butter may congeal when you add it.
Step 3
When the eggs are fully incorporated and the batter is smooth, slowly whisk in the butter mixture. Whisk in the lemon and orange zests. The batter will still be runny and similar in consistency to cake batter. Cover with plastic wrap pressed directly onto the surface of the batter, to prevent a skin from forming. Refrigerate overnight to rest.
Tip
Many recipes containing baking powder do well to rest overnight. This helps with rising, which is especially important for the madeleine - a pastry that puffs up in the center when it bakes.
 Instructions - Day 2: Pipe, Bake, and Serve
Step 4
Place a rack in the center of the oven and preheat the oven to 375°F (190°C) for conventional or 350°F (175°C) for convection.
Tip
In general for baking pastries, set your oven to convection if the option is available. This allows the heat to flow more evenly. It’s an ideal setting because it helps pastries bake evenly on all sides.
Step 5
Using a rubber spatula, place 2 large scoops of batter in a piping bag so that it is one-third full. Push the batter down toward the tip of the bag.
Step 6
Cut an opening about 1/2 inch (1.25 cm) straight across the tip of the bag.
Step 7
Hold the nonstick cooking spray about 4 inches (10 cm) away from a nonstick mini madeleine pan and spray evenly in all the cavities.
Step 8
Holding the piping bag at a 90° angle about 1/2 inch (1.25 cm) above the pan, pipe the madeleine batter into the cavities so that it fills each about three-quarters of the way to the top.
Step 9
Place a rimmed sheet pan upside down on the oven rack then place the mold on top and bake the madeleines for about 2 to 2.5 minutes on the center rack.
Step 10
When you see the batter puff up in the center, rotate the mold 180°. Bake for 2 to 2.5 minutes more, until the sides of the madeleines are golden blonde and the center has set.
Tip
Baking the madeleines on an upside down sheet pan lifts the mold off the oven rack, so that the more intense heat in the bars of the rack does not transfer to the cakes in an uneven fashion. This also allows the heat of the oven to circulate around the mold more evenly, thus baking the madeleines more efficiently.
Step 11
Unmold immediately. Bang the corner or sides of the madeleine pan against your work surface so that the fresh madeleines drop out.
Tip
If you find that the madeleines stick to the mold, for the next batch, try spraying a bit more cooking spray. Keeping the mold clean and washing it thoroughly with a soft sponge after use will also prevent the madeleines from sticking.
Step 12
Using a small sieve, sprinkle confectioners’ sugar evenly over the fresh-baked madeleines. Eat immediately (do not wait for more than even a few minutes!).
Step 13
Madeleines are good only when freshly baked. Do not attempt to store them. However, you can keep the batter in a closed airtight container, with plastic wrap pressed onto the surface, in the refrigerator for up to 3 days.
 Source
- Dominique Ansel